
If you have lots of DVDs being stored on shelves, in boxes, or somewhere else in house, or your laptop doesn’t even have a disc drive anymore, it’s time to digitize your DVD collection and upload to your cloud server like OneDrive for streaming.
Best DVD Ripper to Digitize DVD to OneDrive with Best Balance in Quality, Speed and Size
Generally, ripping a full-length DVD takes up to 30 minutes, depending on computer hardware. It takes you too much time if you own a large collection of DVDs. Incapable DVD rippers want you finish the whole ripping process at a faster speed and output a relatively smaller file size, but this comes at the expense of great video quality loss. Consequently, after you upload the DVD movies to OneDrive, they are blocky and unwatchable, which is the last thing you want to see.
To achieve the goal, DumboFab DVD Ripper manages to strike a perfect balance in speed, size and quality. It finishes ripping a DVD to small-sized movie file within 5 minutes only but delivers a crisp image quality. Additionally, you can rip any CSS, regional, 99-title or other protected DVDs to MP4, MOV, AVI, WMV, MP3, AAC, etc that One Drive or other cloud storage services can recognize. Then you can store DVD movies or TV series to OneDrive for further streaming and playing on iPhone, iPad, Android or other devices.
How to Convert and Upload DVD to OneDrive for Further Storage, Streaming and Playing
Step 1: Load the source DVD files.
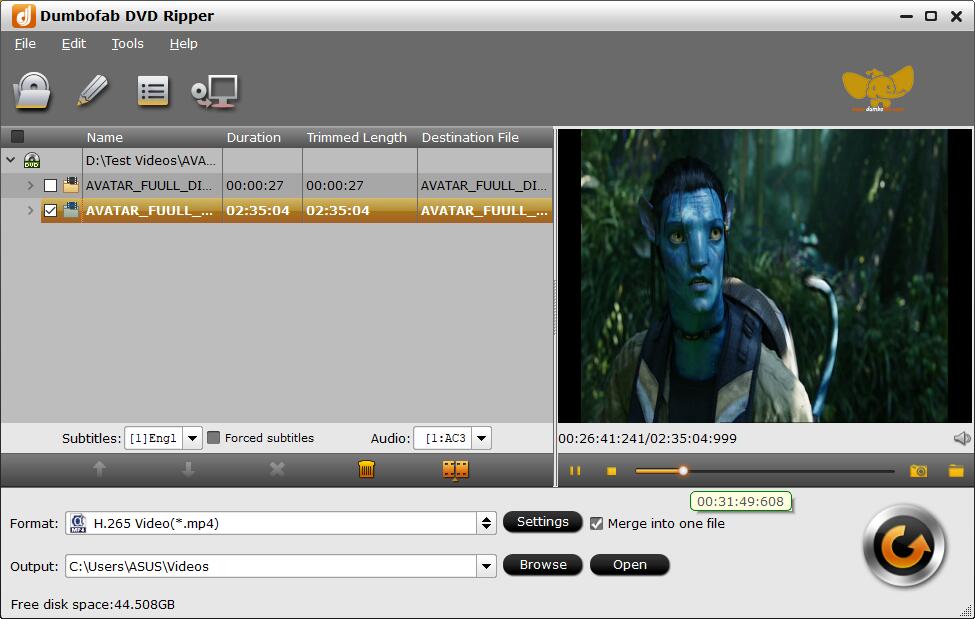
Insert the DVD disc into your computer’s DVD drive. Launch DumboFab DVD Ripper, click Load DVD to add the DVD files to the program. All loaded files will be displayed on the left item bar.
Step 2: Choose an output profile that OneDrive supports.
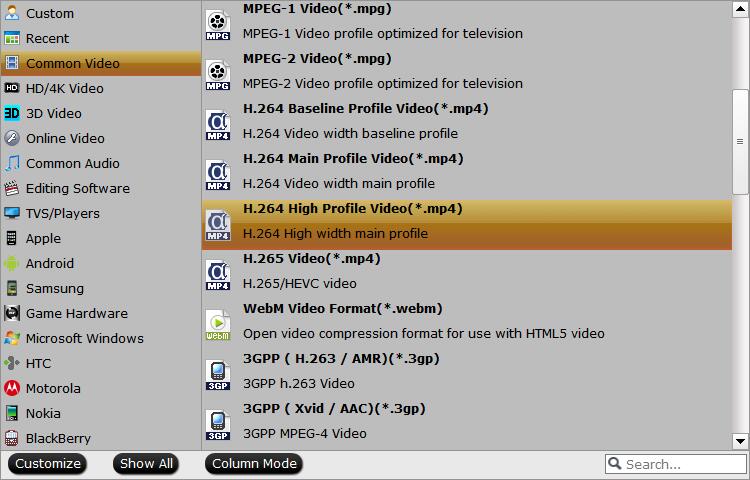
For general uses, MP4 (codec: H.264+AAC) in Common Video is recommended, as it is widely supported by many devices and media players. If need to get a good balance between file size and output quality, flexible options are offered to further reduce the size of the ripped video. Click Settings button below the profile and enter into the parameter settings page. A slew of other variables such the video/audio codecs, pixel dimensions, frame rate, bit rate, audio sampel rate, etc. will help convert a DVD at 7.5GB to a smaller MP4 file to make more room for your OneDrive.
Recommended video size settings:
◆ You’re not suggested to adjust the frame rate and aspect ratio, if not necessary.
◆ You’re recommended to adjust the original Normal quality to bitrates of around 1500-2000 is acceptable and can make your ripped MP4 movie around 1-1.6GB in size, 80% smaller than the original DVD movie, and to the naked eyes, it’s highly unlikely to distinguish the difference between the original movie and the re-encoded video.
◆ Typical DVD videos are 720×480 (NTSC) and 720×540 (PAL). Adjust the resolution to 640×480 won’t make any quality difference.
Step 3: Start ripping DVD.
Click RUN button to begin ripping DVD to digital file. Generally speaking, the Hardware Accelerator is enabled by default, so just leave the box checked to quicken the DVD ripping speed.
How to Upload Converted DVD Movies to OneDrive?
Once your DVD movies being converted to digital files with a DVD copy software, your DVD movie library can be uploaded to OneDrive and streamed later to different devices for playback. Here I list two different ways to help you upload converted DVD to OneDrive.
Options 1: Using the OneDrive website
Depending on the web browser you use, you can upload files up to 100GB in size. (This limit is per file, not total.)
1. On the OneDrive website, sign in with your Microsoft account, and then browse to the location where you want to add the video files.
2. Select Upload.
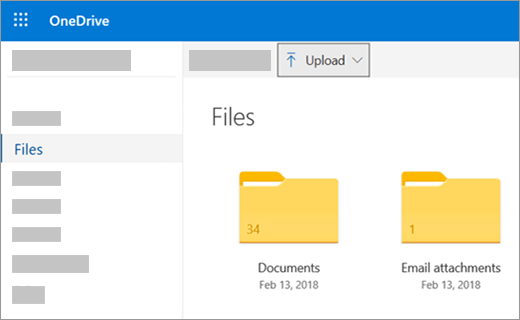
3. Select the files you want to upload, and then select Open.
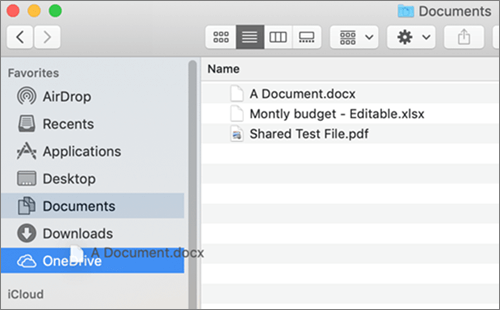
Options 2: Using File Explorer or Mac Finder to copy or move files to OneDrive
You can copy or move converted DVD files between folders within OneDrive, or from other folders on your computer. (When you move files from other folders on your computer into a OneDrive folder, you’re removing them from your computer and adding them to OneDrive.)
For both File Explorer and Mac Finder, if you want to copy the item rather than move it, right-click the file or folder and select Copy, then open the OneDrive folder (or sub-folder) and right-click > Paste a copy of the item to OneDrive.
To move a file using Windows File Explorer, drag files from the file list in the right pane to OneDrive in the left pane.
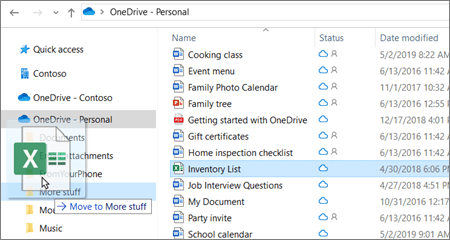
To move a file using Mac Finder, drag files from the file list in the right pane to OneDrive in the left pane (if you have OneDrive listed there under Favorites). After a moment, Finder will switch to show your existing OneDrive files and folders in the right pane, and you can drag the file into the sub-folder of your choice.
After saving the ripped DVD digital video files toto OneDrive, you can then access them from any device, anywhere.