
I have a DVD to Vegas Movie Studio to edit. When I click on media tab I don’t have the Import DVD Camcorder Disc, option. I have attached an image of what I get when I click on Media Tab. If I click on my D drive and then Video TS , there is nothing further to click on. Any way to import DVD to Veagas Movie Studio sucessfully?
Method 1: Import homemade DVD to Vegas Movie Studio
Sony Movie Studio allows you to open up a DVD .IFO file. This imports the entire .VOB chain for both video and audio tracks.
Click File / Open, then navigate to your VIDEO_TS sub directory and enter *.IFO in the File name input field.
For a regular DVD you will see a VIDEO_TS.IFO, and a VTS_01_0.IFO. Select the VTS_01_0.IFO file and click on Open.
Note: Don’t try this on a DVD disk because Sony Movie Studio will try to build an .sfk file containing audio peaks in the VIDEO_TS directory.
Method 2: Rip DVD to Sony Movie Studio Compatible Formats
PS: Available for both homemade and commercial DVDs
Sometimes, you may want to extract some clips from your purchased DVD and put into Sony Movie Studio to create a new project file for further use. On this occassion, Movie Studio won’t allow you to import it because it’s a copyrighted video. Fortunately, there are many tools out there that allow you to rip DVDs into a fully compatible format with Sony Movie Studio. One of the best programs out there is DumboFab DVD Ripper, which has optimized Sony Movie Studio presets for easy access. Here I will take the program as example to show you how to import DVD footage into Sony Movie Studio easily and quickly.
How to rip DVD movies to Sony Vegas Movie Studio with ease
Step 1: After you open DumboFab DVD Ripper, click “Load DVD” to add the DVD files you want to rip. On the software main interface, there is a viewing window provided for you to preview the DVD files to ensure the files are what you want to rip. You can also take snapshots of the DVD movies when previewing them.
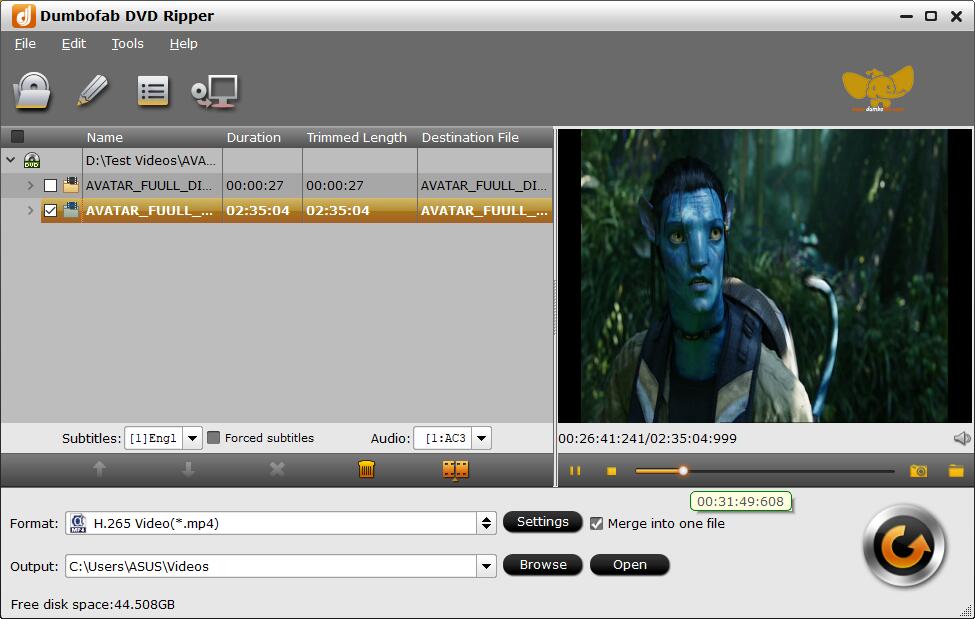
Tip: You can either convert all the DVD titles or just choose some titles to convert. And to combine all the added DVD titles into a single video files, just click the Merge into One File button to join all added DVD files.
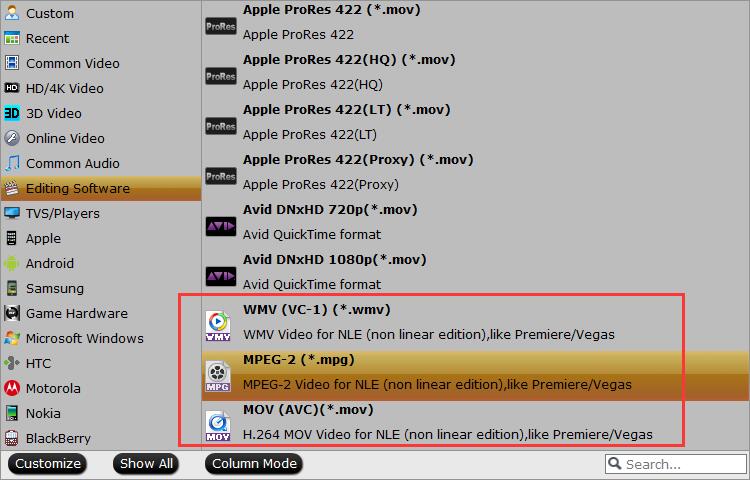
Step 2: Click the Profile bar, and move mouse cursor to “Editing Software” and then choose “MPEG-2” as the output format. The output video will keep the original quality of DVD video and seamlessly fit Sony Movie Studio 17, 16, 15, 14, 13, etc.
Step 3: When all is done, click “Convert” to begin the DVD to Vegas Movie Studio video conversion. Just wait for the process to finish. After that, you can get the MPEG2 videos and just open Sony Vegas Movie Studio and import the converted MPEG-2 videos for editing.
You see, it’s just so easy to turn DVD to Vegas Movie Studio supported video formats in a few clicks! Just get the DVD ripper and enjoy DVD editing in Sony Vegas Movie Studio.