Digital camera photos are valuable possessions of your life. They can be swell-kept memories of family, friends, and places, which you never want to lose. But deletion and other technical hiccups can result in the loss of photos from digital cameras. This post shares how to recover deleted or missing photos from DSLR, GoPro, camcorder, digicam, Android, and other cameras using professional digital recovery software.
Sometimes it happens the images saved in the camera got corrupted due to several reasons. But the major question here arises is how to retrieve deleted pictures from digital cameras.
To perform photo recovery from camera, we recommend this tool- EaseFab Data Recovery
The most efficient and easiest way to retrieve deleted data like photos, videos and other files from an SD card used in a camera is with a data recovery software like EaseFab Data Recovery. Unless your device was connected to a computer and made use of its Recycle Bin, it is not possible to recover a deleted file without software. You need to use quality data recovery software that can scan the card and get back your important images.
Highlights of the Data Recovery software from EaseFab Studio:
Recover Data from All Storage Devices
With the ultimate and professional data recovery tool, you can recover lost data from almost all devices or storage media with ease, such as PC/laptop hard drive, USB flash drive, SSD, external hard disk, pen drive, floppy disk, digital cameras, action camera, drone camera, dashcam, camcorder, video player, music player, DSLR, SD card, PC, HDD, etc.
3 Simple Steps to Recover Deleted Photos/Videos from SD Card
Below are the steps to follow in order to restore deleted photos from an SD card of your digital camera that can be connected to your Windows machine.
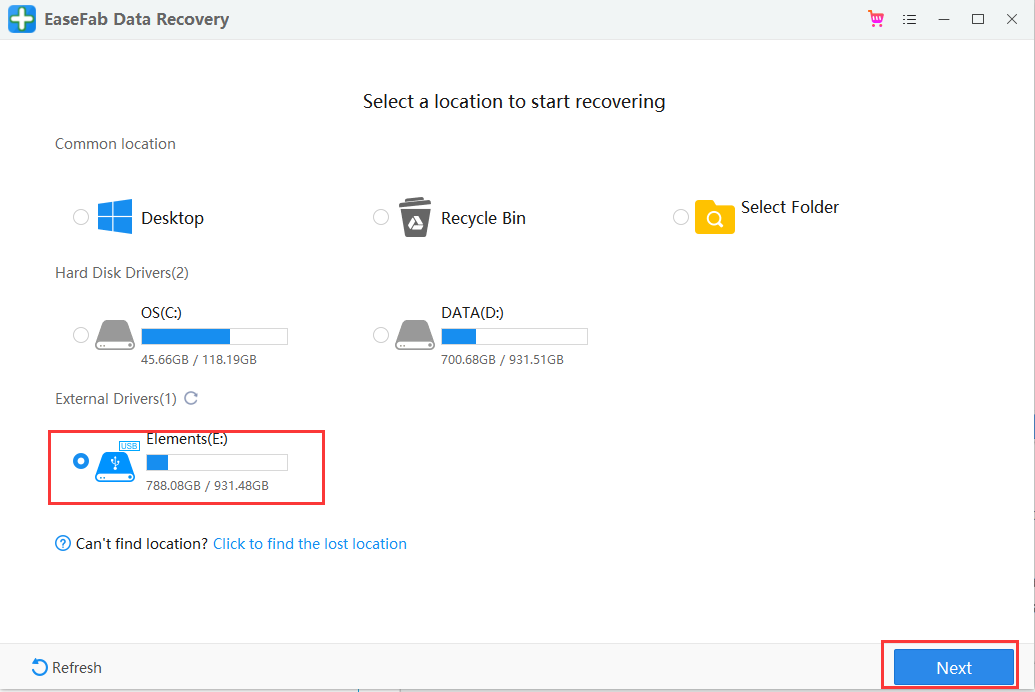
Step 1. Select the SD Card to Scan
● Attach the SD card to your computer: This can be done either with a card reader or by directly connecting the device that contains the card to your machine.
● Launch EaseFab Data Recovery, and then find and select the SD card under “External Drivers”. Click “Next” to enter a window that contains different recovery modes. Here you’re recommended to select “Quick Recovery” mode, after that, click “Start” to begin the scanning process.

Step 2. Check for scan results to find lost photos
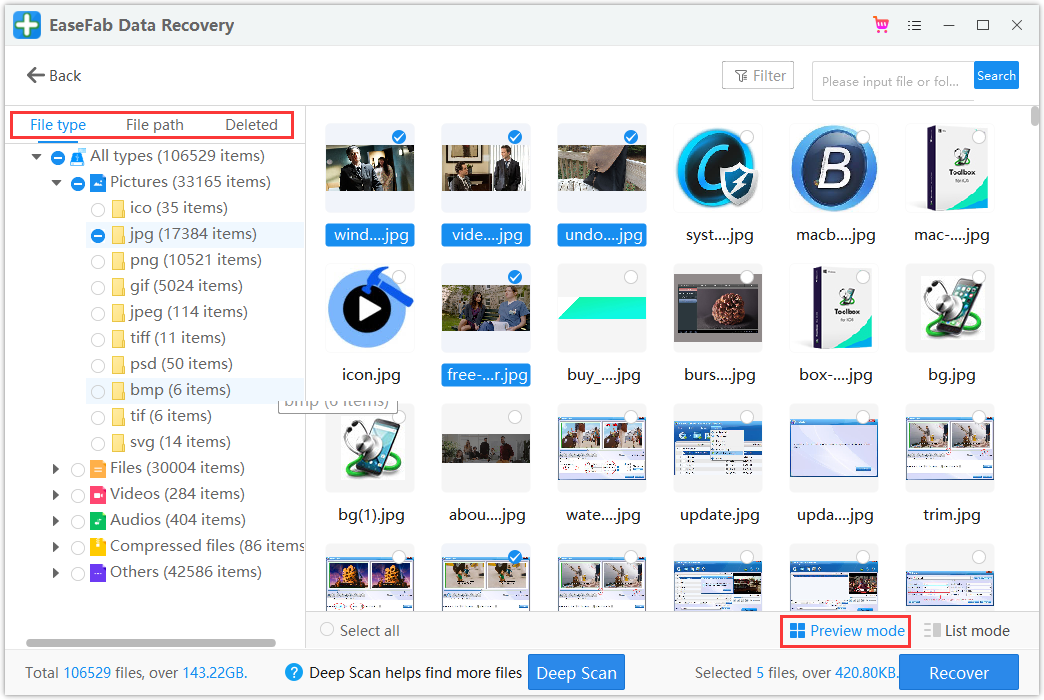
Once the scanning completes, click “Pictures” (or “Videos”) in the left panel. If you want to locate the lost or deleted photos or videos, click “Deleted” on the top list of left panel. You can quickly locate a specific type of file by using the “Filter” feature as well as the “Search” option.
Tips: You can double-click the photos to check if they are the wanted files. And you can switch to “Preview Mode” to have a better image display.

Step 3. Recover Photos from your digital camera
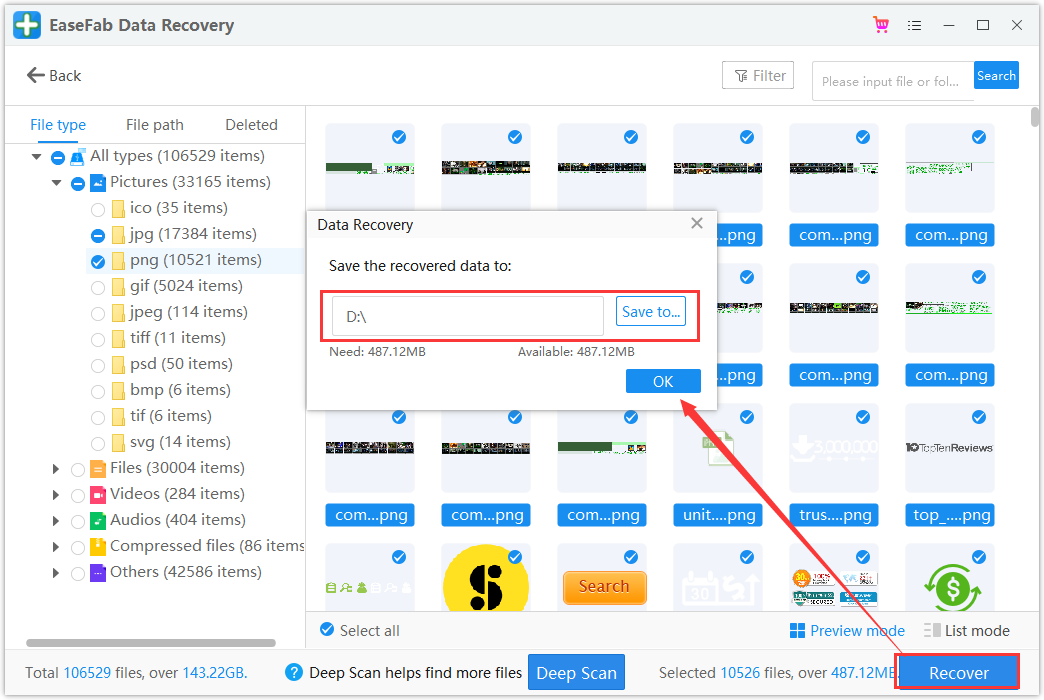
● Choose desired image files and click “Recover”.
● Choose a different location to save the recovered files instead of the original SD card of your digital camera.

To Sum Up
The camera memory card is very sensitive. They actually need special care. After knowing the causes of the reasons for losing data from the camera’s SD card, you should avoid such reasons so that you can never face this issue again.