
4K delivers a crisp and beautiful viewing experience across a wide range of platforms. As many flagships and mid-range smartphones have enabled shooting 4K videos in their superior cameras, hence social media sites need to upgrade their apps to support 4k video play. Youtube being the primary videos library already had 4K uploading features. But you might fail to upload 4K to YouTube due to different reasons. Here we help you troubleshoot 4K video not uploading to YouTube problems.
Part I. Why 4K Video Not Uploading to YouTube Properly?
YouTube 4K uploading error can be caused by various reasons, from the poor computer configuration, improper 4K video specifications, to bandwidth of network and so on. Let’s take a closer look of the culprit of 4K video not working properly on YouTube.
◉ Underpowered computer hardware
If your computer configuration is not strong enough to play 4K UHD videos, there is a big possibility that YouTube 4K uploading won’t go smooth. You may get stuck on uploading process, only taking forever to uploading. Actually, updating the computer graphic cards could be the best option to troubleshoot this. Or else, you can also downscale 4K UHD video for easier uploading on the existing computer hardware.
◉ Improper 4K video specifications
In Samsung community, a user complains that he selected a 8K video from Galaxy S20 to upload to YouTube, but it only shows in 1080p. That’s because the video is not matched with YouTube required video specs. Thus YouTube may auto compress the video within the accepted range.
◉Network bandwidth
A great deal of users complained that they’ve got stuck in 360p, and higher resolutions such as 1080p and 4K have been taken a long time to process. After 4K video uploaded, 4K option is not available on YouTube, or YouTube 4K video dropping frames. This does some matter with internet bandwidth.
Part 2. Best Encoding Settings for Uploading 4K Video to YouTube
In order to upload 4K files to YouTube and play properly, you have to follow YouTube’s official recommended upload encoding settings for your 4K videos
Container: MP4
● No Edit Lists (or the video might not get processed correctly)
● Move atom at the front of the file (Fast Start)
Audio codec: AAC-LC
● Channels: Stereo or Stereo + 5.1
● Sample rate 96khz or 48khz
Video codec: H.264
● Progressive scan (no interlacing)
● High Profile
● 2 consecutive B frames
● Closed GOP. GOP of half the frame rate
● CABAC
● Chroma subsampling: 4:2:0
Frame rate
● Content should be encoded and uploaded in the same frame rate it was recorded
● Common frame rates include: 24, 25, 30, 48, 50, 60 frames per second (other frame rates are also acceptable)
● Interlaced content should be deinterlaced before uploading. For example, 1080i60 content should be deinterlaced to 1080p30
Bitrate
The bitrates below are recommendations for uploads. Audio playback bitrate is not related to video resolution.
| Type | Video Bitrate, standard Frame Rate (24, 25, 30) | Video Bitrate, High Frame Rate (48, 50, 60) |
| 2160p (4k) SDR | 35-45 Mbps | 53-68 Mbps |
| 2160p (4k) HDR | 44-56 Mbps | 66-85 Mbps |
Audio bitrate: 128 kbps (Mono), 384 kbps (Stereo), 512 kbps (5.1)
Part 3. Convert 4K Videos to YouTube Best Video Settings
If your 4K videos uploaded to YouTube are with the format of AVI, WMV, MKV, etc that incompatible with YouTube in unsupported encoding settings, you can download DumboFab Video Converter to convert it to YouTube’s favorite 4K H.26High Profile video.
DumboFab Video Converter as the best 4K video converter is available to convert 4K videos to MP4, tweak video frame rate, bit rate, codec, audio etc., trim and crop video and resize 4K videos for YouTube uploading.
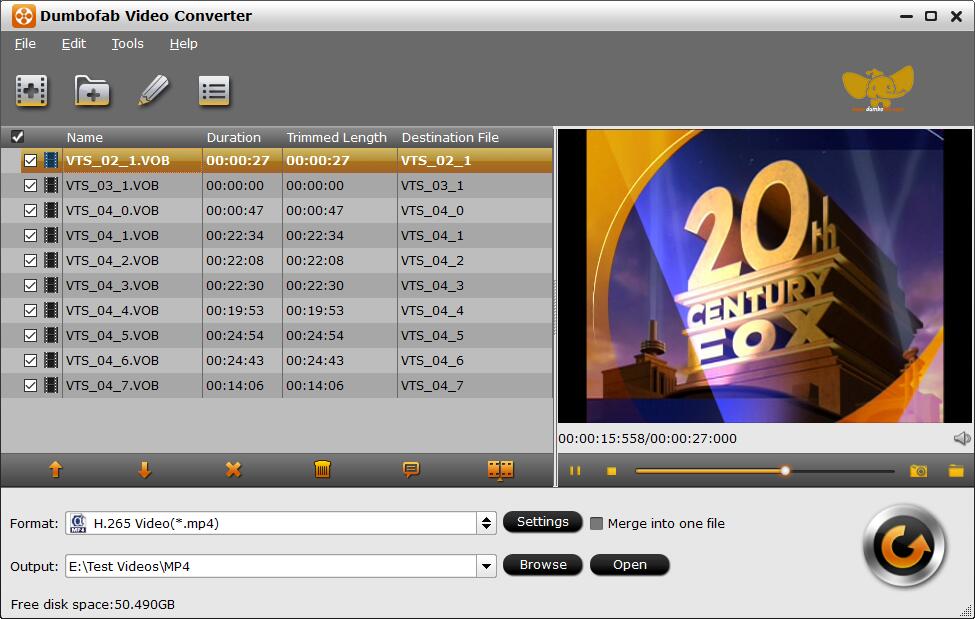
Step 1. Import 4K video files
Click Add button or drag & drop 4K video files MP4 to DumboFab Video Converter after launching it.
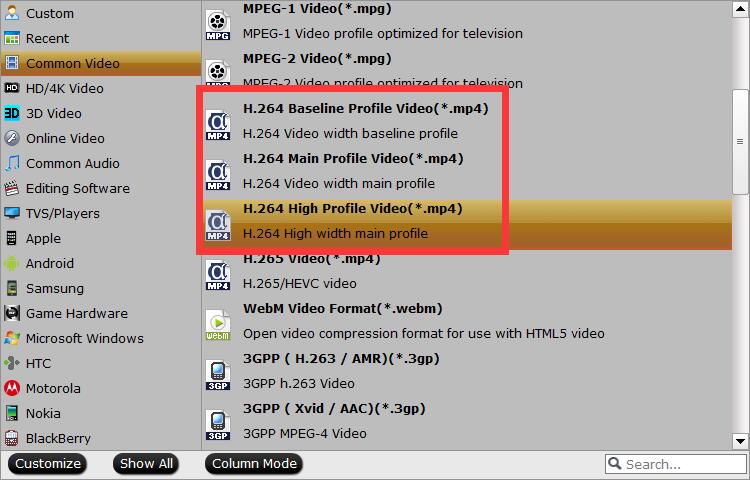
Step 2. Choose output video format
Next, specify the output video format. Click “Format” and choose H.264 MP4 as your output video format for YouTube. Click Settings icon to modify the video audio settings as above mentioned.
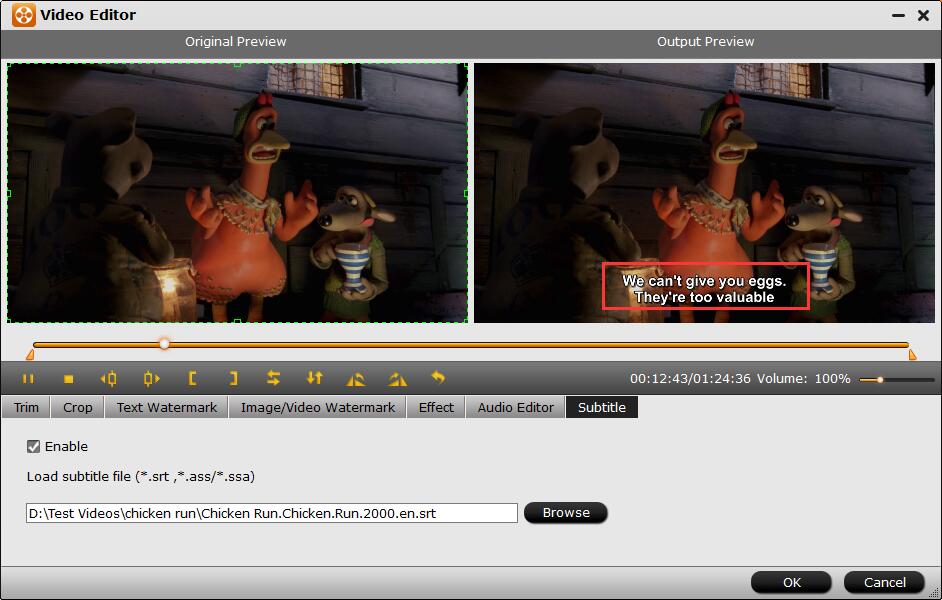
Step 3. Edit your movie(Optional)
Click Edit button to enter the Video Editor Window. As you see, you can trim, crop or adjust the video with the built-in video editor to get the very part and effect of the movie you want. Now YouTube has a maximum video length of 12 hours, which should outlast most of your uploads.
Step 4. Start the conversion
Click “Convert” button to start encoding4K video to YouTube. After the conversion, click “Open” button to get the exported files and then upload the converted 4K files into YouTube for sharing.
Part 4. How to Upload 4K Video to YouTube?
1. Click the “Upload video” button at the top right corner of YouTube page. Then drag and drop the file you just converted.

2. Wait for the video uploading and processing. And fill the Title, Description, Thumbnail, Tags sections.
3. Go to the drop-down menu on the right side the privacy settings allows you to limit the audience who can watch your video.
4. Click “Next” for Advanced settings, such as comments, video embedded settings etc.
5. After all that done, check the bar at the top. When it shows 100% of video processed, you’re now ready to publish your 4K video.