
I recently installed Resolve and I have some AVI files i need to import. opening the drives in the media browser i can see the folder but not the files in it. are there any plugins i can use to add codecs to resolve?
There are many issues when import AVI files to Davinci Resolve. In this article, I will give you some hints.
AVI is not very good format for post. It’s old and simple. Misses to many key points- timecode, aspect , field order info etc. Don’t count Resolve will ever have better support for it.
100% Working Solution to Fix “Can’t Import AVI to DaVinci Resolve” Error:
Transcoding AVI to DaVinci Resolve Supported DNxHD, ProRes…
To import AVI files successfully, DaVinci Resolve needs to be compatible with the specific codecs used in the MP4 files. If not, you’ll experience AVI importing or rendering error.
Transcoding should be a very helpful method. DumboFab Video Converter makes an easy work of converting AVI videos to DaVinci Resolve supported DNxHD, ProRes, MOV H264 formats so as to fix AVI codec incompatibility or missing issues. As for the video quality, don’t worry too much. With the constantly updated conversion algorithm and the advanced high quality technology, it guarantees you the output AVI video with up to 99% quality reserved, wrinkles or freckles in image still clear enough to count.
How to Transcode AVI to DaVinci Resolve Compatible Formats
Step 1. Download and launch EaseFab Video Converter on Windows PC or Mac. Click Add Video button to import your MP4 video. Dragging and droppping works too. (Note: batch conversion is supported, so you can several mov videos to the program to convert at a time.)
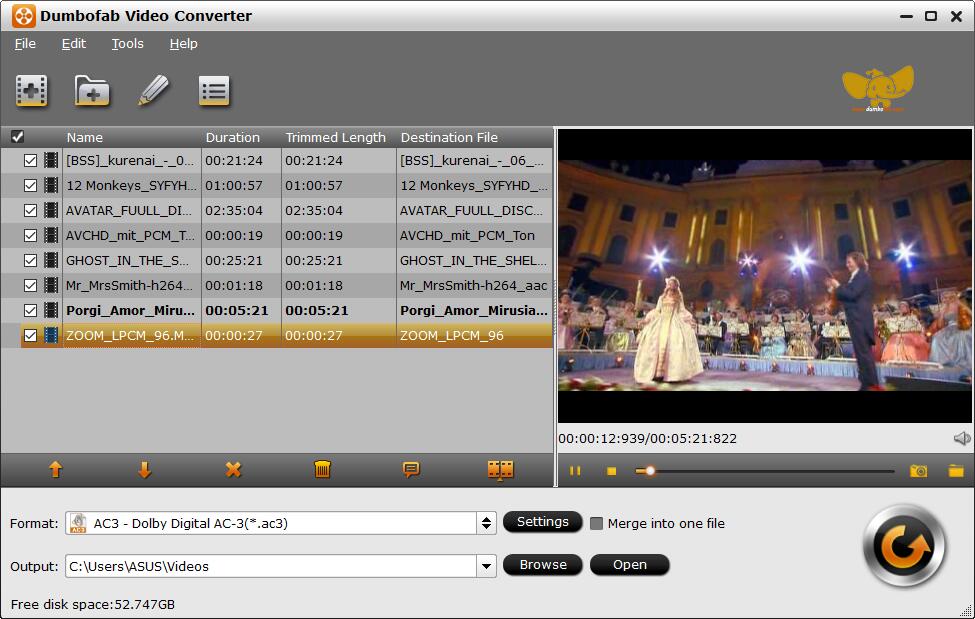
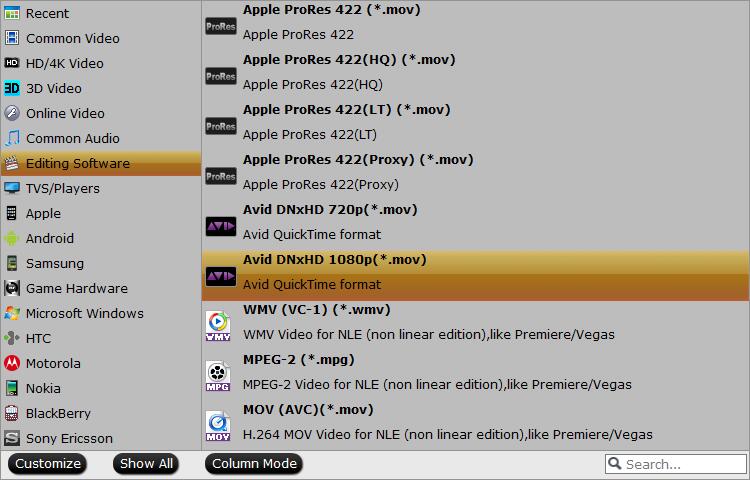
Step 2. Click Profile pull down list, move mouse cursor to Editing Software. To encode the incompatible MP4 video for editing in DaVinci Resolve, you can select MOV (encoded by H.264 codec), DNxHD 720P, DNxHD 1080p or Final Cut Pro X (encoded by ProRes codec) as the output profile.
Important Note: The output H.264 MOV files can preserve image quality with the smallest file size. The DNxHD and ProRes files can preserve the best image quality and provide better performance when editing in DaVinci Resolve Please not that ProRes files typically need ten times as much storage of H.264-based files.
Step 3. You can cut, crop, merge, rotate, etc. to make some easy video edits in a linear manner with EaseFab Video Converter. You can also click Settings button to adjust the codec, resolution, frame rate, bitrate, etc.
Step 4. Hit Convert and it will begin fast video decoding, conversion and processing your AVI video at one go. After the conversion is complete, get the resulted files via clicking the Open button and then you can import the result files.
Importing videos into DaVinci resolve
Importing videos into DaVinci Resolve is a very simple process. You’ll first want to go to the media tab located at the bottom of the screen.
There are then three ways to go about importing your footage. Once there, you’ll want to click on “file” in the upper left-hand corner and then hover over “import” and click on “media’ in the drop-down menu.

You’ll then be brought to your finder or file window where you can import whatever footage you’d like. This can also be accessed by hitting ctrl + m or cmd + m on your keyboard. The other way to do this would be to drag your footage from the finder or file window into the empty space below the playback window.