
Deleted important files and emptied your recycle bin? Follow the 4 ways to get it back.
Is Recycle Bin Recovery Possible?
In a word, yes. When the Windows operating system deletes an item, it does not physically remove it from your storage media. Though you can’t see or access the data, it can be recovered even after you empty the Recycle Bin. The key is to recover files deleted from the Recycle Bin before they are overwritten by new data. To accomplish this goal, you should stop using your computer until after you are finished restoring your lost files. We will present several methods to recover files that have been deleted from Recycle Bin if you act quickly.
Method 1. Recover Permanently Deleted Files from Recycle Bin After Empty
Files won’t be recycled but permanently deleted if they are removed in the following ways:
● Use the “Shift + Delete” keys.
● Files/folders are too big to recycle, bypassing the recycle bin.
● Windows recycle bin is too full to keep the deleted items.
Recovering files deleted from the Recycle Bin goes beyond the abilities of the Recycle Bin. However, Recycle Bin recovery tools such as EaseFab Data Recovery can make it easy to recover files deleted from the Recycle Bin in Windows 11/10/8/7.
The program can thoroughly scan the computer drive and recover deleted files from Recycle Bin after empty. It’s very easy to use and has many optional advanced features as well. EaseFab Data Recovery can recover deleted or lost files, photos, videos, documents, messages, etc. from hard drives, external drives, memory cards and much more.
Now download and install EaseFab Data Recovery on your Windows PC, and follow the step-by-step guide to retrieve your deleted files back.
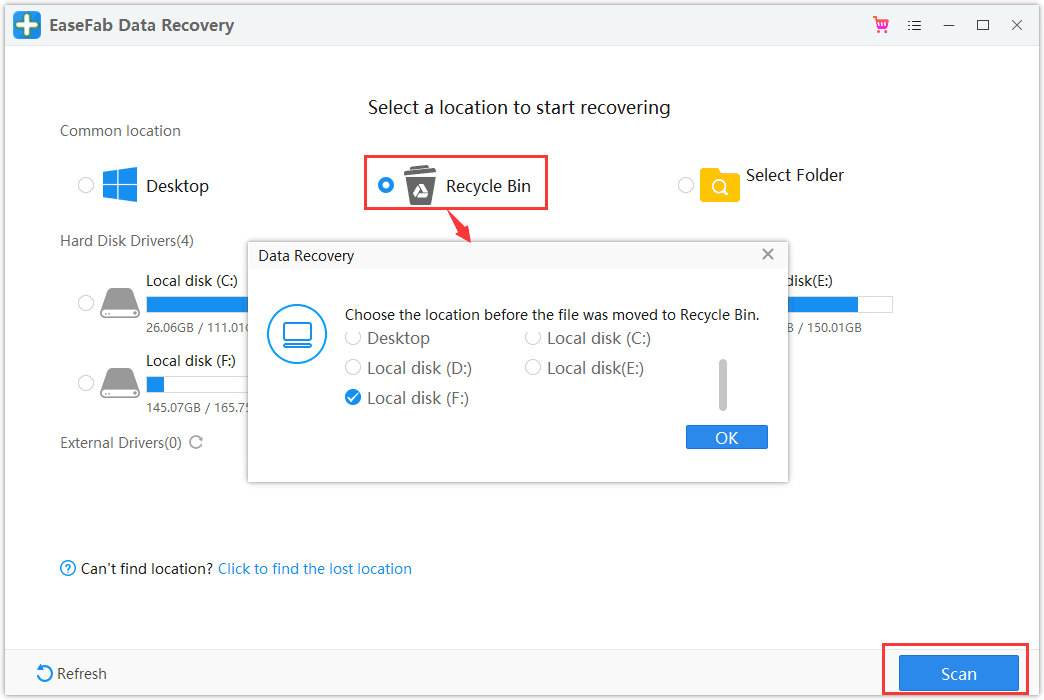
Step 1. Launch EaseFab Data Recovery software on your PC, select “Recycle Bin” and hit “Scan“. From the pop-up window, choose a location before the file was removed to Recycle Bin and click “OK” to start the scanning.
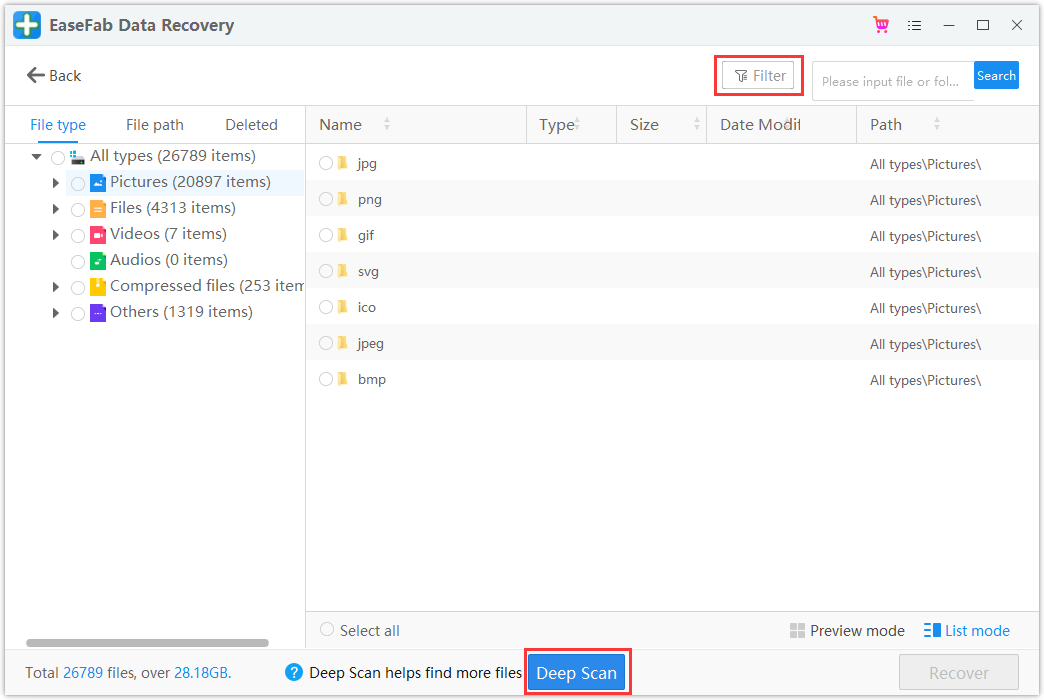
Step 2. The recycle bin recovery software will start scanning the disk to searching the lost files, it will take a minute to finished. After the scanning process, you can browse your files according to “File Type”, “File Path” or “Deleted” methods to locate the deleted or lost files. You can also quickly locate a specific type of file by using the Filter feature as well as the Search option.
Tip: You can also click Deep Scan button to scan more lost files.
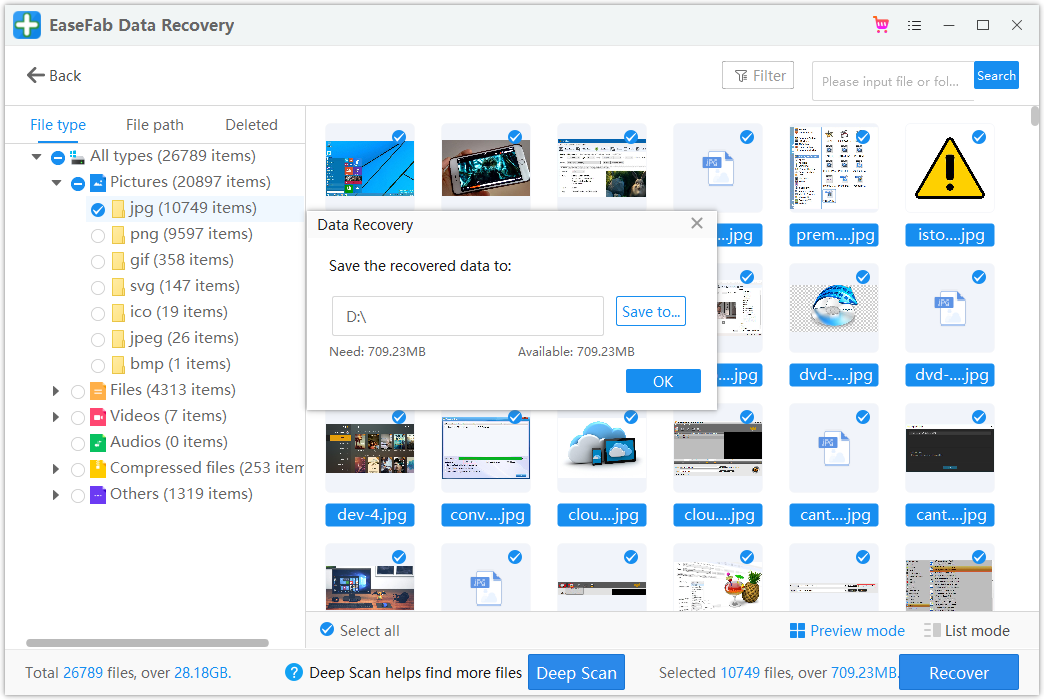
Step 3. Once you locate files you want to restore, you can can double-click it for a full preview. Then, select the target files and click “Recover“. We suggest you select a different volume or an external USB drive to save the recovered files to avoid data overwriting.
Method 2. Recover Deleted Files using Windows File Recovery
Microsoft provides its own data recovery software tool, called Windows File Recovery. While not nearly as easy to use or capable as EaseFab Data Recovery, you should still consider giving Windows File Recovery a try because the software can recover an unlimited amount of data for free, and it works with Windows 10 2004 and above.
Windows File Recovery is a command-line tool and required a bit of learning, especially if you have no prior knowledge of CLIs. Below are the steps to recover files using Windows File Recovery.
Step 1. Download Windows File Recovery from Microsoft Store.
Step 2. Restore a single file by typing in the command: winfr C: D: /n \Users\JaneDoe\Documents\Work\some_important_doc.docx to restore the file (if found) from drive C: to Drive D: Note that you can’t restore the file from C: and save it on the same C:
Step 3. Restore specific file formats using the command: winfr C: D: /n \Users\JaneDoe\Movies\*.MP4 \Users\JaneDoe\Pictures\*.PNG. This command tells Window File Recovery to scan the Movies folder and Pictures folder for MP4 files and PNG files, respectively.
Step 4. To recover a folder use the command: winfr C: D: /n \Users\JaneDoe\Documents\Personal\. This recovers the “Personal” folder located in Documents.
Step 5. To search and recover documents containing certain phrases, use: winfr C: D: /r /n *account statement* Windows File Recovery will then search for files that contained “account statement.”
Method 3. Recover Deleted Files/Folders with Previous Version
Windows saves previous versions of a file when it creates a restore point. Try these steps to attempt this type of recovery.
Note that this method is only for a try. Let’s see how to find the previous version of your lost files:
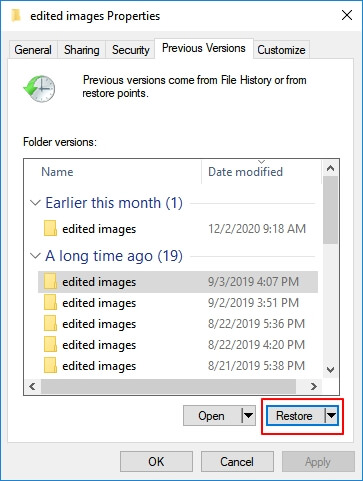
Step 1. Open Windows File Explorer on your PC. Navigate to the folder that is used to save the deleted content, right-click on it and select “Properties”.
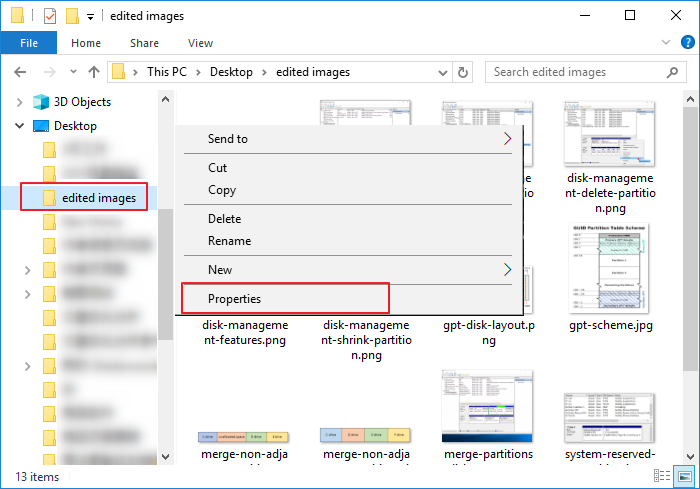
Step 2. Click “Previous Version” and choose a version before the date you deleted the file, and click “Restore”.
Step 3. After restoration, you can reopen the file folder and check if your lost files show up in the original location on your computer.
Method 3. Recover Lost Deleted Files from File History Backup
Windows 10 and Windows 8 come with interesting features related to file recovery – File History. If you have created a backup of your deleted files via Windows File History on the computer, congratulations and you can bring them back on your PC. However, if you didn’t create a backup, nothing will be found.
Below are the detailed steps of recover deleted files from File History backup.
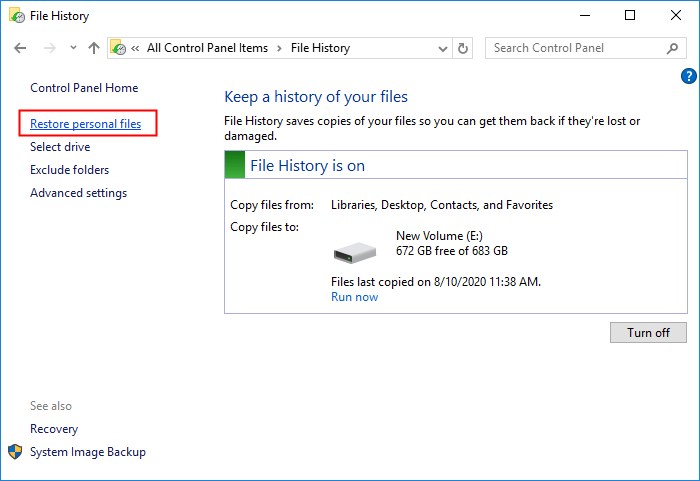
Step 1. Open Control Panel, and click to enter “File History.”
Step 2. Click “Restore personal files” on the left panel to open your backup files.
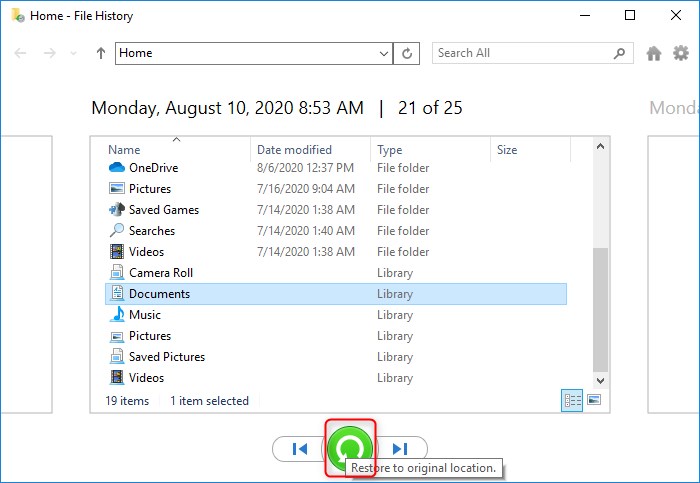
Step 3. Use the left and right arrows to choose the files you want and click the “Restore” button.
Important Note:
There’s nothing more important when it comes to preventing the loss of important data than regular backups. If you don’t want to purchase a dedicated backup storage device (external hard drive is a great choice), you can back up your data to the cloud using Dropbox, Google Drive, Microsoft OneDrive, or any other cloud storage solution with a free plan.