I ran into this issue with the new update of the iPhone causing video files to be transferred as the codec HEVC instead of the universal codec H.264. These iPhone HEVC files can’t be imported to Final Cut Pro X.
Searching some clues in FCP forum, as some guys suggested that shoot & edit in HVEC/H.265 native with Final Cut Pro, no problem, if you’re on High Sierra or later. And yes, it is better quality than H.264.
While for some guys are still running on older macOS, you will have no luck to import iPhone H.265 videos to Final Cut Pro. To slove the issue, the usual workflow is to transcode HEVC files to ProRes 422 for Final Cut Pro.
ProRes “HQ” is a bit of overkill for iPhone clips, ProRes 422 is plenty enough. “HQ” isn’t really buying you anything extra, considering you’re recording really high compression to start with.
To convert iPhone H.265 to ProRes, you can use EditReady, Compressor, DumboFab Video Converter for Mac or something else.
Below is the tutorial on converting iPhone H.265 videos to Final Cut Pro with DumboFab Video Converter for Mac.
As a great assistant for NLEs, this Mac video converter offers many professional encoders — Apple ProRes, Apple Intermediate Codec, DNxHD, DVCPRO, HDV, MPEG-2, etc. — ensuring maximum editing quality and efficiency when working with Final Cut Pro, iMovie, Avid Media Composer, Adobe Premiere Pro, Premiere Elements, DaVinci Resolve and more. Plus, this software also allows you to transcode 4K H.265/HEVC to MP4, AVI, MOV, WMV, FLV, etc format.
Steps 1. Load source H.265 video files
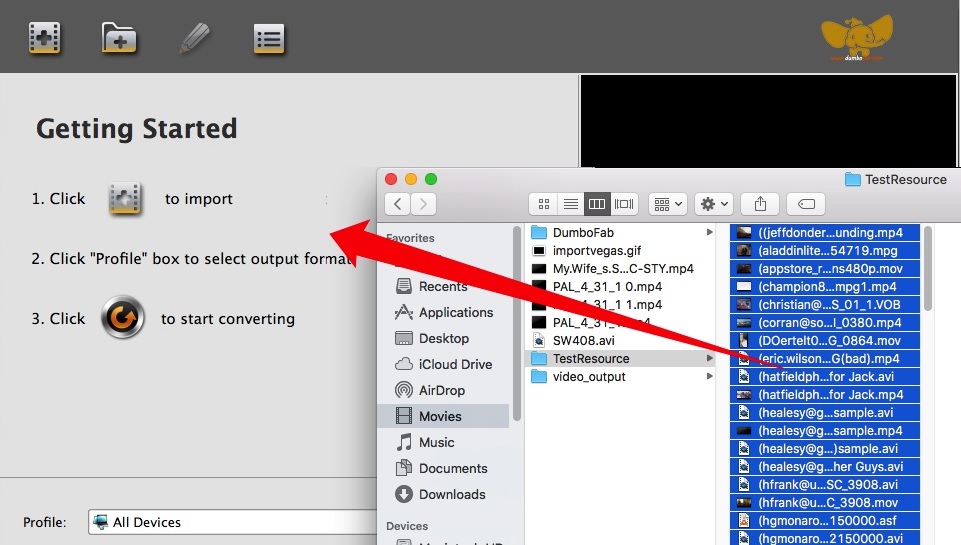
Launch DumboFab Video Converter for Mac, and then drag and drop the source HEVC videos from iPhone into the main UI for loading, or navigate it through the Add buttons on the main UI.

Step 2. Choose ProRes 422 as output format
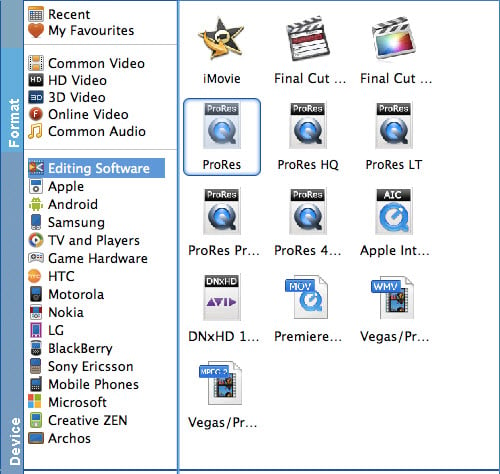
Clicking the Format bar, you can choose Final Cut Pro X, or Final Cut Pro 7 from the Editing Software category.

Tip: By clicking the Settings icon, you can adjust video and audio parameters like codec, bit rate, frame rate, sample rate, etc., in that way, you can take charge of the size and quality of the output files. In principle, the larger input values, the better output quality, but the corresponding larger file size.
Step 3. Start converting H.265 to ProRes
Hit the Convert button to activate iPhone H.265 file to ProRes conversion.
When all conversions completed, you’ll get a pop-up notice. Just click “Open” button, you can fast find where your converted files are saved.
Besides transcoding source H.265 videos, if you have existing HEVC footage you need to edit in FCP, there’s another slightly less easy workaround.
Import the clip into the Photos app on your Mac. Then, once it’s fully imported (which could take a little while depending on how much video we’re talking about here), then just select the clip(s) you need and Export them from Photos. Photos will export them with a codec that Final Cut Pro X can read. So once the clip(s) is/are exported from Photos to whatever location you chose, then open Final Cut Pro and import the clip(s) you just exported from Photos.